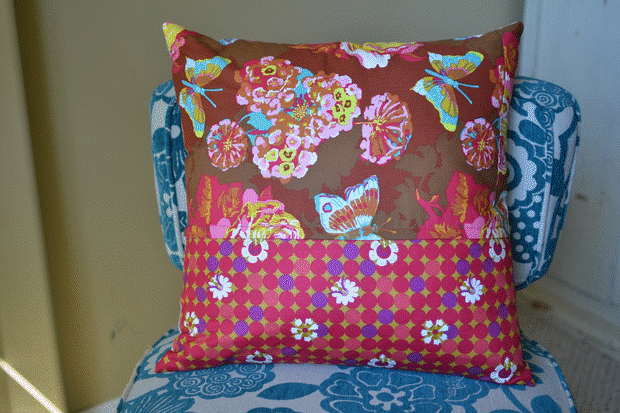
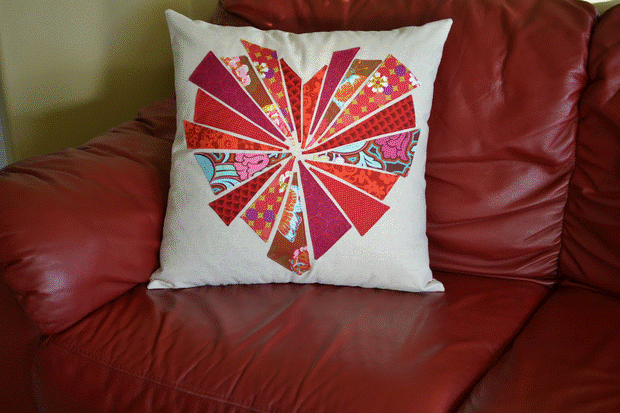
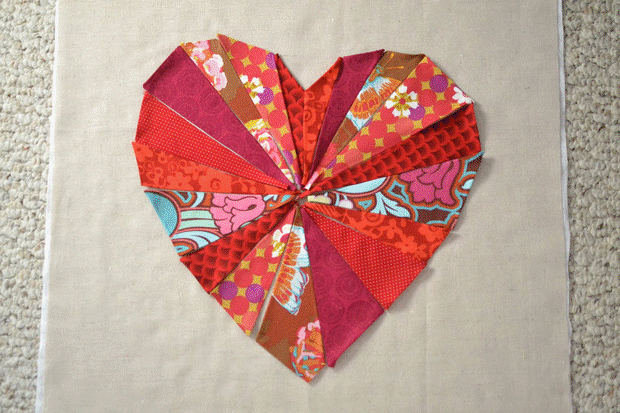
It’s February! Time to get ready for Valentine’s day. I was sad I didn’t get to make any Christmas decorations this year, so I vowed to sew something cute for V-Day. Here is my Bursting Heart Pillow! It was inspired by this cute Alchemy Sweet Slices Pillow by Amy Butler. Amy offers it as a free pattern on her site. I saw it at Quilt Market and fell in love with it.
Since I needed mine to resemble a heart I ended up making my slices a little differently than the pattern. I tried out an applique method my sister told me about that she used on a recent V-day quilt she made.
I took a few pictures of how I made my pillow front if you want to make one too.
Here’s a Bursting Heart Mini tutorial: when I say „mini“, this tutorial will show you how to make the front of the pillow. I will leave the details of how to make the back of the pillow up to you.
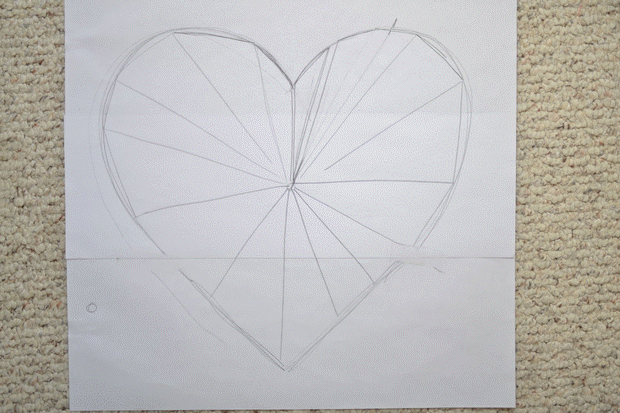
Start out with a square of paper that is the same size as your pillow form. Mine was 20 inches.
Draw a big heart on it. Remember that when you „burst“ your heart it will get bigger. I ended up ultimately making mine 1/4 in smaller all the way around because I started too big. Draw lines from the center of the heart to the edges and then connect the outer points along the curves to make triangles.
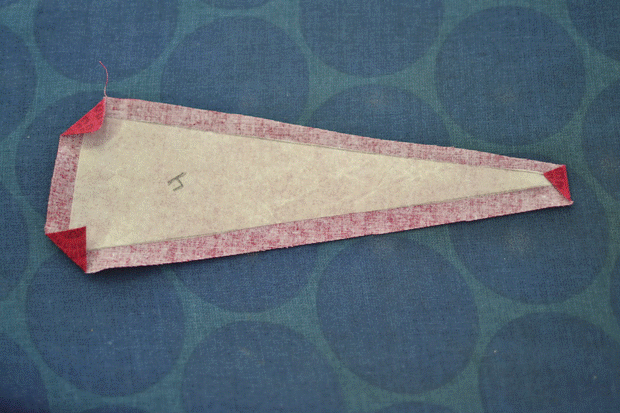
Next trace the triangles filled heart onto the paper side of fusible web and number each triangle. Cut the triangles out right on the lines. Fuse the triangles to the back of different fabrics (I used 7 fabrics) and then cut around the triangles about 1/4 in.
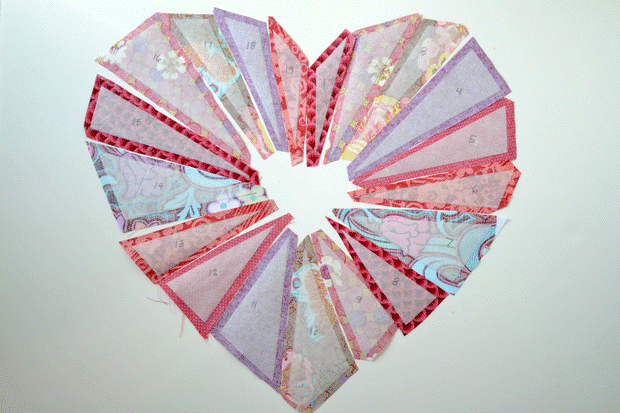
Next press the raw edges over the paper starting with the corners first….
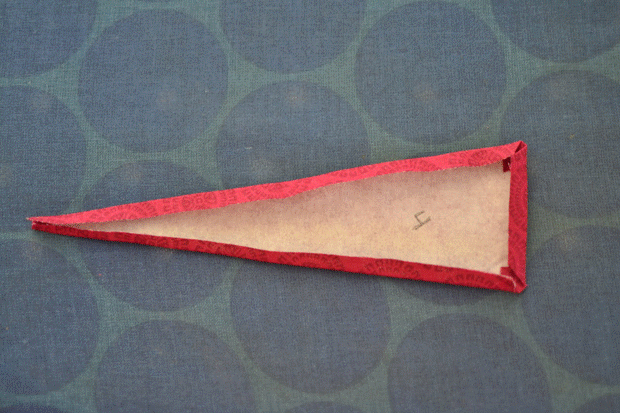
Now remove the paper leaving the fusible web attached to the back of the fabric. Use the tip of an iron to fuse the raw edge of the fabric to the center.
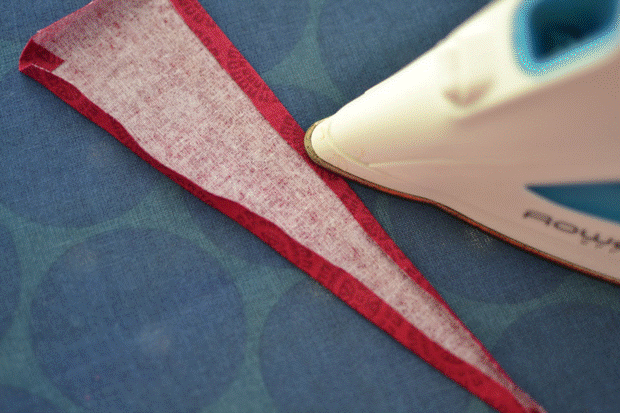
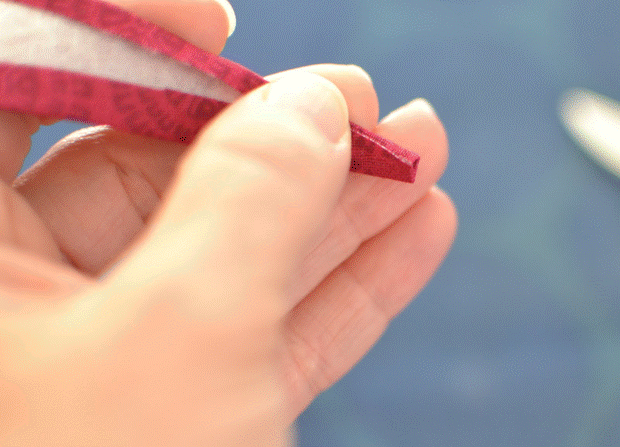
Trim any excess fabric that gets in the way of your tiny point. The downfall of this method is that the points don’t fuse leaving them precariously open until you stitch them down. If you want perfect points you’ll get better results using Amy’s method. I’m okay with scrappy.
Now put your heart puzzle together on the right side of your pillow front making sure it is centered. For my front fabric square I used Osnaburg with a layer of white muslin under it. Osnaburg is a cheap utility fabric that has a natural linen look. I cut it at 20 inches square for a 20 in pillow form. If your finished pillow cover is a little smaller than your pillow form it will have a much nicer look to it.
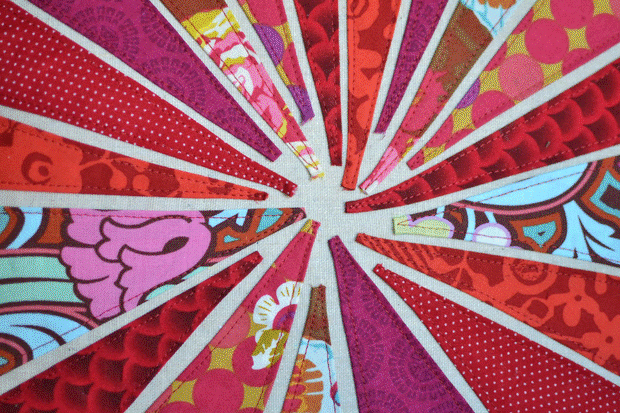
Now burst your heart by pulling out the triangles that you wish. Until you have it the way you like it. Now you can gently iron it down and the centers of all the triangles will fuse in place. I ironed it while it was on the floor since I figured there were enough layers to protect my carpet. If you laying it out on a wood surface or cutting mat I wouldn’t suggest ironing over it. I also pinned each triangle in one spot just to be sure it stayed put while sewing and to hold my muslin layer in place.
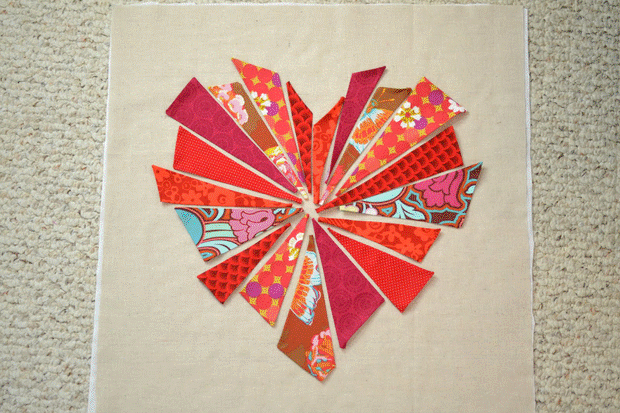
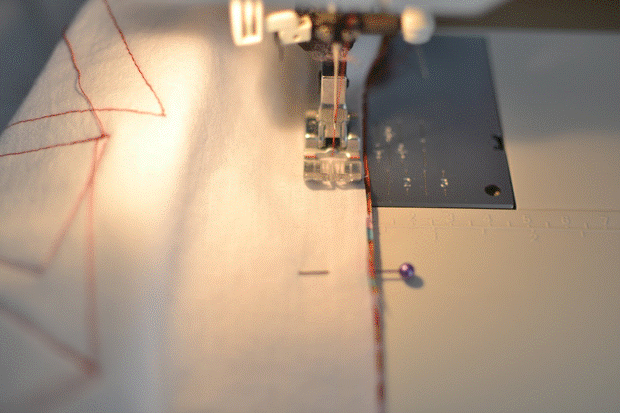
Now stitch around each triangle. I sewed all the way to the edge on the skinny points. As you can see, some turned out better than others.
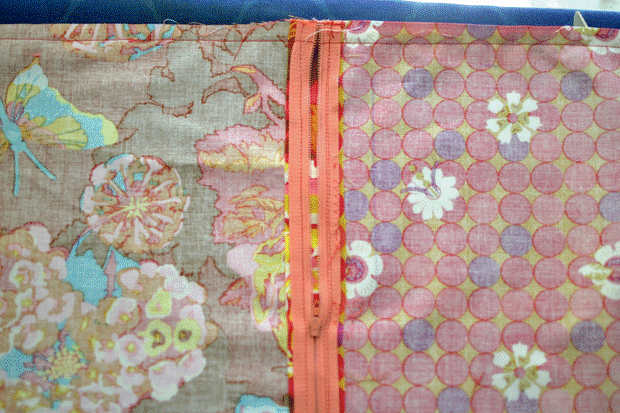
Lastly put together your pillow back. There are a variety of ways to close a pillow. I made a zipper closure in mine. HERE is a good tutorial if you want to put in a zipper too.
Just as a note: If you are putting in a zipper, make sure to leave it partially unzipped so you can turn it inside out.
Now place your front and back with RIGHT sides together and stitch around all four sides. I used a 3/8 inch seam allowance.
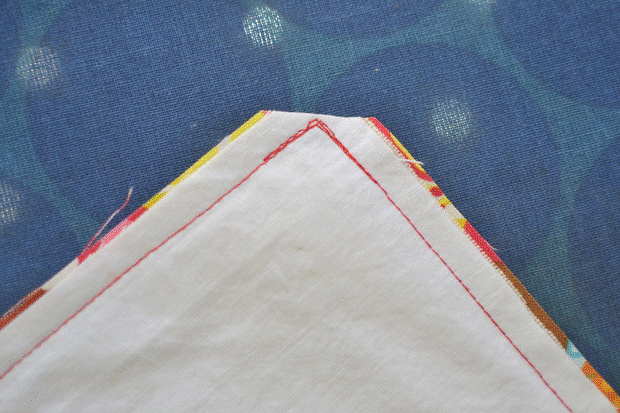
Clip your corners to get a perfect point. And turn your pillow cover inside out.
One more tip: I like to stitch around the corners twice. A little extra stitching helps prevent the corners from fraying out when you clip them.
And there you have your beautiful Bursting Heart Pillow. Please let me know if you make one! I’d love to see your version.
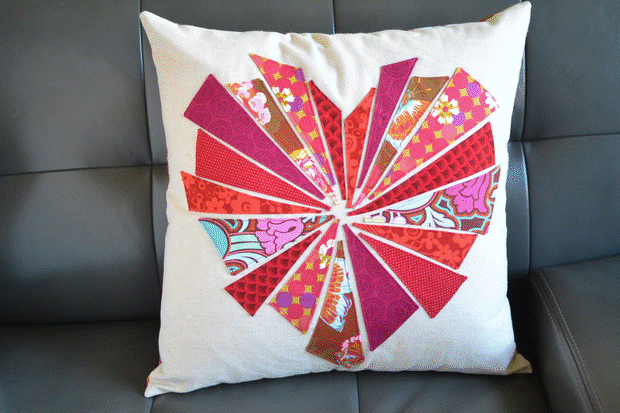
Image Courtesy: http://bluesusanmakes.blogspot.com
